Download the Greenlite Smart Thermostat App
The Greenlite application is available for iOS and Android Devices. Use the links below to be directed to the application download pages on the AppStore and Google Play


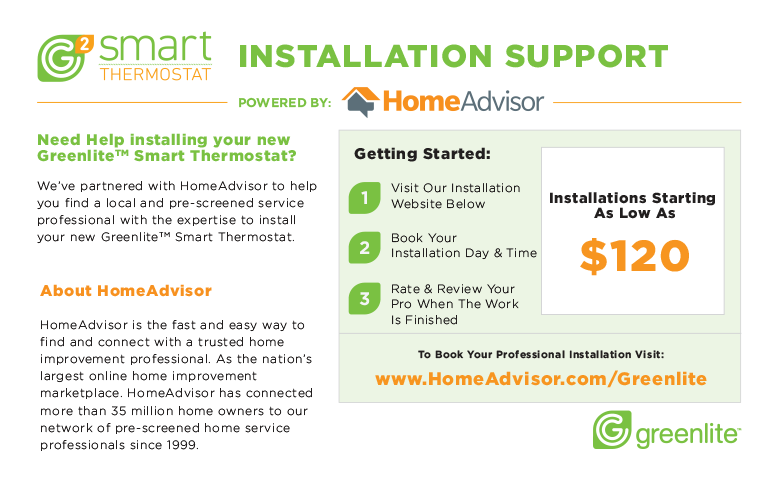
Installing your new Greenlite Smart Thermostat is easier than you might think!
The Greenlite application is available for iOS and Android Devices. Use the links below to be directed to the application download pages on the AppStore and Google Play
Watch our detailed video explaining how to install your Greenlite thermostat with a C-wire: https://www.youtube.com/watch?v=aCJt7UWItVs
Watch our detailed video explaining how to install your Greenlite thermostat without a C-wire: https://www.youtube.com/watch?v=itpaZtRbCuw
Learn how to operate your new Greenlite G2 Thermostat by watching this simple video: https://www.youtube.com/watch?v=Yo2sEWHNgs0
Learn how to the use the Greenlite Thermostat App to operate your Greenlite G2 Thermostat: https://www.youtube.com/watch?v=m6Ykuu-1BAA
Learn how to connect your Greenlite G2 Thermostat to iOS and Apple Home Kit in this short video: https://www.youtube.com/watch?v=m0PURome2kM
Learn how to connect your Greenlite G2 to Amazon Alexa Device in this video: https://www.youtube.com/watch?v=GoFJU3RHJDA
Learn how to connect your Greenlite G2 Thermostat to an Android device in this video: https://www.youtube.com/watch?v=b1KrV3OZCQE
 Download the G2 Installation Manual (PDF format, 1MB)
The Greenlite Thermostat App takes an intuitive approach to organizing your thermostats and locations:
Programmable thermostats automatically change the thermostat’s set temperature between comfort levels and energy saving levels at specified times, according to the programs you set up. Generally, to save energy, you would set up 4 program periods for each day – 2 comfort programs and 2 energy saving programs. Here is an example of typical comfort and energy saving program periods for weekdays:
| PERIOD | HEAT MODE | COOL MODE |
| MORN | 6:00 AM 70°F (21°C) | 6:00 AM 78°F (26°C) |
| DAY | 8:00 AM 62°F (17°C) | 8:00 AM 82°F (28°C) |
| EVE | 6:00 PM 70°F (21°C) | 6:00 PM 78°F (26°C) |
| NITE | 10:00 PM 62°F (17°C) | 10:00 PM 75°F (24°C) |
Yes, Greenlite programmable thermostats can be used to replace most conventional low voltage and millivolt thermostats. The same wires used for installation of conventional mechanical thermostats are used for installation of programmable electronic thermostats.
Yes, programmable thermostats can save energy and save you money on utility bills. According to the U.S. Department of Energy, a programmable thermostat can reduce heating costs by up to 35% and cooling costs by up to 25%. Your savings will largely depend on the length of your energy saving program periods and the temperatures set. For example, an energy saving period of 10 hours with the temperature set back 10° will save more than a 5 hour energy saving period with the temperature set back 5°.
Don’t worry, all Greenlite thermostats are pre-programmed with a typical energy-saving schedule, with separate programs built-in for Heat and Cool.
Yes! You can change any of the preset times and/or temperatures to suit your schedule.
Yes, Greenlite has a staff of trained technicians to help you with any questions you may have. The technical assistance telephone number is 844.695.9090.
They can be either or. Installation is made easier with a C-wire connection (5 wire). If a C-wire is not available, the power bridge can be installed to adapt it to a 4 wire system as long as there is a common terminal on the air handler control board and the heat is gas/petrol based.
The wires coming out of the wall will attach to a “lettered” terminal on the base of your thermostat. The system common terminal is labeled “C”; if you have a wire connected to this terminal, you are system powered.
You can use the included Power Bridge to power and operate your thermostat. Alternatively, your local heating/cooling (HVAC) professional can install a “C” wire for your existing thermostat.
Changes requested through Alexa voice commands will be visible on the thermostat display screen and the mobile app.
Changes you make to your thermostat settings from the website can take up to five minutes to take effect on your thermostat. For the mobile apps, changes should take effect immediately when you are connected to the same wireless network as your thermostat. Changes made from other wireless networks or from outside your home can take up to five minutes to take effect.
Your thermostat will maintain the schedule you have set for it even when it’s not connected to the Internet. To reconnect your thermostat:
First check that your wireless router is working and you have access to the Internet. If your Internet connection or router is down, your thermostat will reconnect automatically when your Internet connection is restored.
If that doesn’t work, confirm that your thermostat is connected to your router. If your thermostat is connected to your WiFi router, you’ll see a WiFi icon on the upper right hand corner of the screen. If not, your thermostat is not connected to your router, and you should continue with the suggestions below until your thermostat is connected to your router again.
Try resetting your thermostat. Remove the thermostat from the wall and press the RESET button on the back. Once pressed, replace the thermostat on the wall. Once the thermostat is connected to your router, it will display a WiFi icon on the upper right hand corner of the thermostat’s screen.
If none of the above steps resolves the issue, you should perform the setup process again. Consult the product manual for instructions.
For Heat Pump systems, ensure that the thermostat is configured for the Heat Pump system type.
If you want to cool your home, make sure that your thermostat is in Cool or Auto mode and that your target temperature is below the ambient temperature shown on the thermostat. If you want to heat your home, make sure that your thermostat is in Heat or Auto mode and that your target temperature is above the ambient temperature shown on the thermostat.
If the thermostat was just installed, review the wiring connections that were made for any errors. Make sure you were using the correct wiring diagram for your specific heating/cooling system type.
Contact our Technical Assistance Line (844.695.9090, techsupport@greenliteusa.com) or your HVAC service company. Please make sure that you are prepared to provide us with the exact terminal letters and wire colors from your previous thermostat. NOTE: any wires that were not used on your previous thermostat will not be used on the new thermostat.
The wires coming out of the wall will attach to lettered terminals on the base of your thermostat. The system common terminal is labeled “C”; if you have a wire connected to this terminal, then you are system powered and can proceed with a typical c-wire installation.
Use the Power Bridge, included in the package with G2 thermostats. Please refer to the “Installing without a c-wire” section in the Installation Manual or watch our video online: https://www.youtube.com/watch?v=SGTZ_0Yp0iY
Alternatively, your local heating/cooling (HVAC) professional can install a C-wire for your thermostat.
Use the Power Bridge, included in the package with G2 thermostats. Please refer to the “Installing without a c-wire” section in the G2 Installation Manual, or visit this link to view the manual online.
Alternatively, your local heating/cooling (HVAC) professional can install a C-wire for your thermostat.
The G2 will not support an actual 2 stage heat pump system. However, a lot of users refer to a regular 1 stage heat pump with Emergency/Auxiliary heat as a 2 stage heat pump system. The G2 will work in a 1 stage heat pump with auxiliary heat setup, whether it’s dual fuel or all electric.
Setting a schedule saves you money and energy. Many people don’t set heating and cooling schedules because their thermostats are just too difficult to operate. Using the Greenlite Thermostat App to control your thermostat offers an intuitive interface that makes setting your schedule a breeze.
The set temperature is the temperature your thermostat will keep your home at or near. If your home is in cooling mode, your cooling system will turn on if the temperature in your home rises above the set point. If your home is in heating mode, your heating system will turn on if the temperature in your home falls below the set point.
If your thermostat is in Cool mode, your cooling system will turn on if the temperature in your home rises above the set point. Cool mode is best for the summer months, when there’s no chance you’ll want your heat system activated. To protect your cooling equipment from possible damage, do not use Cool mode when the outdoor temperature is below 50°F/10°C.
If your thermostat is in Heat mode, your heating system will turn on if the temperature in your home falls below the set point. Heat mode is best for the winter months, when there’s no chance you’ll want your cool system activated.
If your thermostat is in Auto mode, heating or cooling modes will be automatically activated within the range of your heating and cooling schedules. To protect your cooling equipment from possible damage, do not use Auto mode when the outdoor temperature is below 50°F/10°C.
If your thermostat is in Off mode, you are not using your HVAC system to control your home’s temperature.
When your fan is set to Auto, it remains off until needed to circulate warm or cool air through your home. When your fan is set to On, it runs continuously, even if your HVAC system is not actively heating or cooling your home. Setting your fan to Auto is the more energy-efficient choice.
The IAQ mode uses your fan to intermittently circulate air in your home, which keeps the air quality in your home clean, fresh, and healthy.
If your thermostat is in Auto mode, Heat or Cool modes will be automatically activated within the range of your heating and cooling schedules. You may notice that on the website and mobile apps you can’t make any temporary changes to the current Set Temperature. Additionally, you won’t see the current Set Temperatures for Heating and Cooling.
First, make sure that your thermostat is installed and can be controlled by the Greenlite Thermostat App. To connect your thermostat with Google Home, please visit this article for detailed instructions.
To connect your thermostat with an Android device using the Google Assistant, please visit this article for detailed instructions.
To connect your thermostat with an iOS device using the Google Assistant, please visit this article for detailed instructions.
Here are some examples:
Your thermostat will maintain the schedule you have set for it even when it’s not connected to the Internet. To reconnect your thermostat:
First check that your wireless router is working and you have access to the Internet. If your Internet connection or router is down, your thermostat will reconnect automatically when your Internet connection is restored.
If that doesn’t work, confirm that your thermostat is connected to your router. If your thermostat is connected to your WiFi router, you’ll see a WiFi icon on the upper right hand corner of the screen. If not, your thermostat is not connected to your router, and you should continue with the suggestions below until your thermostat is connected to your router again.
Try resetting your thermostat. Remove the thermostat from the wall and press the RESET button on the back. Once pressed, replace the thermostat on the wall. Once the thermostat is connected to your router, it will display a WiFi icon on the upper right hand corner of the thermostat’s screen.
If none of the above steps resolves the issue, you should perform the setup process again. Consult the product manual for instructions.
Maybe. If you use the same wireless router and network name, your thermostat should reconnect automatically in your new location. Otherwise, you must reconnect your thermostat to the Internet using the setup process. Don’t forget to update your Profile with your new location’s information.
Different systems require different setup options. When the thermostat’s SYSTEM TYPE settings are adjusted properly, this sends the appropriate fan signals for applications that require the thermostat to trigger the blower fan during heating (as opposed to the system handling this task).
Check that the Fan mode is set to AUTO, instead of ON. If the blower fan continues to run after removing the front half from the wall plate (for at least 5 minutes after removal), this would indicate that there is a fault in the HVAC system, not the thermostat. Consult your local HVAC technician for service.
First, check that the thermostat’s OFFSET setting is not set to 0 (zero). This needs to be set to at least 1 or higher for the 2nd stage of heating to work. If this doesn’t resolve the issue, confirm that the Aux heating wire is attached to the thermostat’s “W2” wire terminal.
On the thermostat connected to your heat pump, confirm that the Aux heating wire is attached to the “W2” wire terminal. The “W2” terminal is used for both Aux heat and also Emergency Heat.
Remove the thermostat body from the wall plate. Check to see if the heating or cooling output turns off within the next few minutes. If it does not, these components can be turned off at the circuit breaker panel.
If the thermostat was just installed, review the wiring connections that were made for any errors. Make sure you were using the correct wiring diagram for your specific heating/cooling system type.
Note that if you are trying to use your cooling system, the thermostat may not activate a cooling stage until its compressor protection time has elapsed (this may be a long as 5 minutes).
Fill the hole behind your thermostat that contains its wires with non-combustible insulation or putty to prevent any drafts. Drafts from this hole can impact the thermostat’s room temperature measurement accuracy.
For Heat Pump systems, ensure that the thermostat is configured for the Heat Pump system type.
If you want to cool your home, make sure that your thermostat is in Cool or Auto mode and that your target temperature is below the ambient temperature shown on the thermostat. If you want to heat your home, make sure that your thermostat is in Heat or Auto mode and that your target temperature is above the ambient temperature shown on the thermostat.
If the thermostat was just installed, review the wiring connections that were made for any errors. Make sure you were using the correct wiring diagram for your specific heating/cooling system type.
Contact the Greenlite team if you have questions about your new thermostat. The FAQ above contains answers to the most commonly asked questions.