Download the Greenlite App
The Greenlite application is available for iOS and Android Devices. Use the links below to be directed to the application download pages on the AppStore and Google Play


Setting up your first smart lightbulb is easy! All you need is the Greenlite iOS or Android application, access to a 2.4Ghz Wi-Fi network, and at least one Greenlite SMART LED lightbulb. Follow the instructions on this page, and you will be enjoying a smarter lighting experience in no time!
The Greenlite application is available for iOS and Android Devices. Use the links below to be directed to the application download pages on the AppStore and Google Play
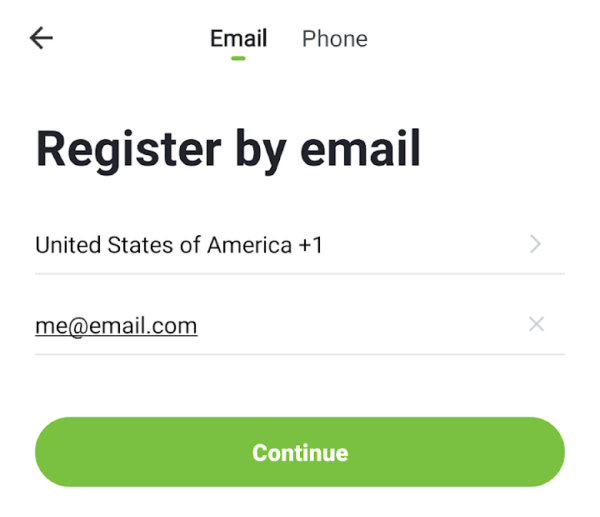
If this is your first time connecting your Greenlite application to a Greenlight SMART LED lightbulb, you will have to create an account.
You have the option to use your email address or your mobile phone number as your username. In both cases, the application will then ask you to select a secure password.
Now that you have downloaded the Greenlite app and created your account, it is time to connect to your first lightbulb.
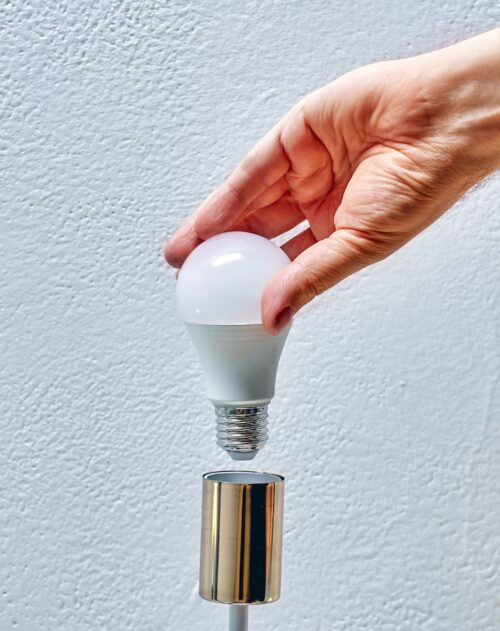
Screw the Smart Bulb into the socket and switch the power on. The bulb will begin flashing to indicate it’s ready for setup.
If your bulb is turned on but not blinking, it must be reset. To do so, turn the light switch OFF for 10 seconds. Then, turn the light switch ON and OFF 3 times at a steady pace then leave it switched to ON. It should start blinking rapidly.
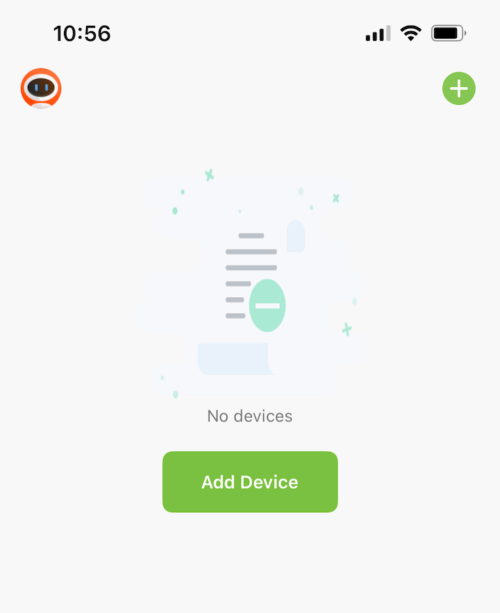
It is time to connect your first lightbulb. To do this, tap “Add Device” in the home screen, as shown here.
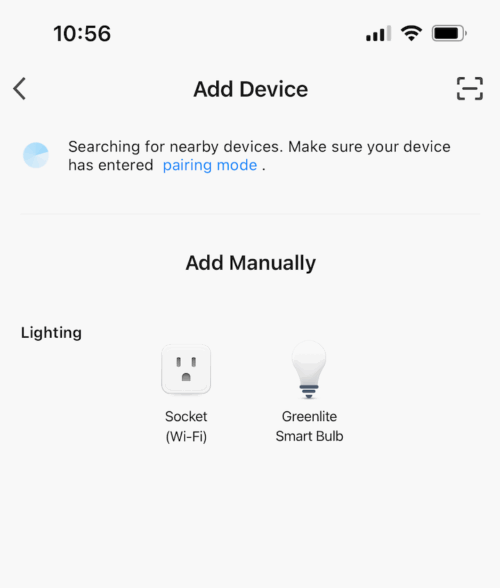
After selecting “Add Device,” you’ll be taken to the next screen. Your phone will automatically search for the Smart Bulb.
You can also choose “Add Manually.”
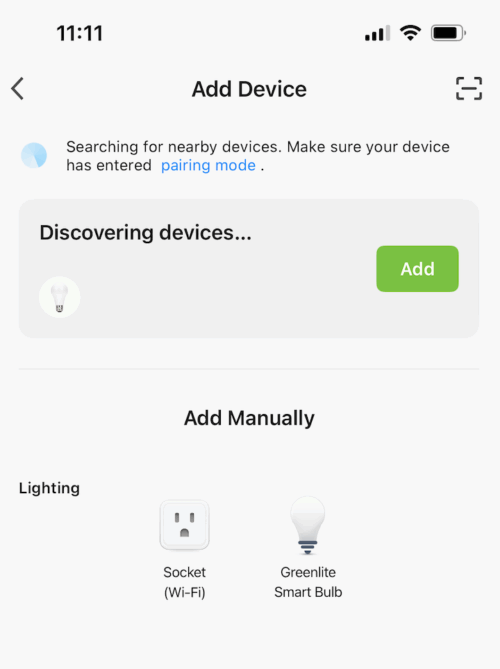
Once your SMART Bulb appears in the devices, “ADD“
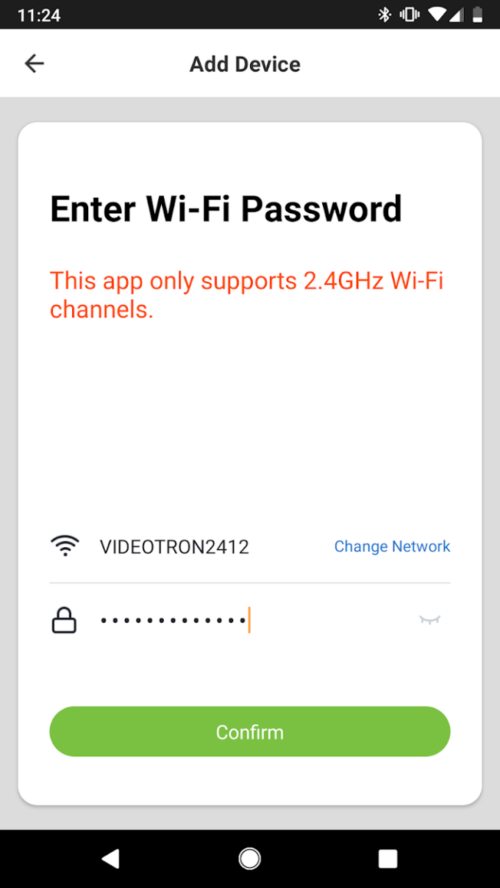
Please note that connected lightbulbs only work with 2.4Ghz Wi-Fi networks.
You must now provide your device with the information it needs to connect to your Wi-Fi network.
By default, the application will select the network to which your device is connected. You can choose another network to connect your mobile device and your lightbulb to if you wish.
Enter your Wi-Fi password and tap “Confirm” to connect your lightbulb to your network.
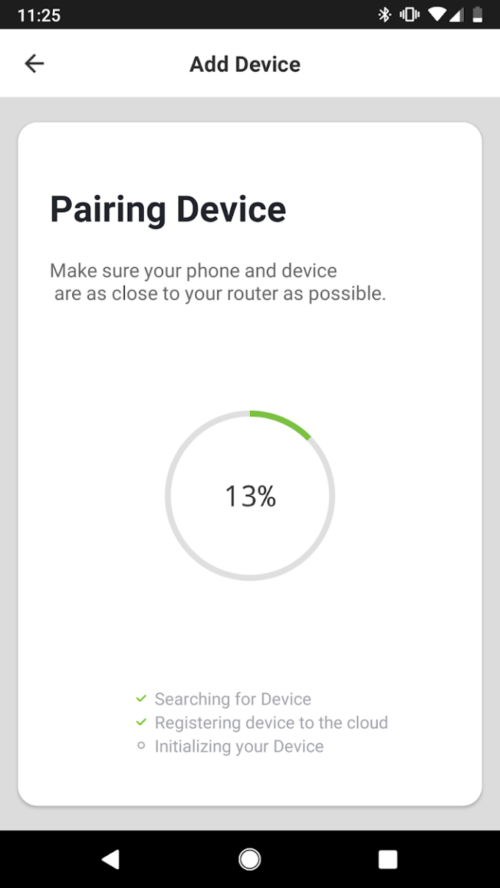
After your lightbulb successfully connects to your Wi-Fi network, the application will enter the pairing sequence.
During this stage, your new bulb will connect to the Internet directly, allowing you to control it even if you are not at home.
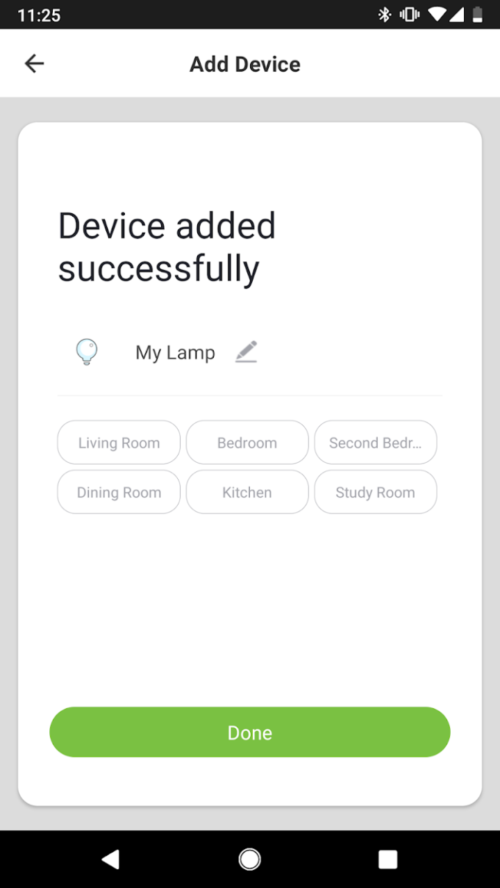
Once your new lightbulb is successfully connected to your Wi-Fi network, you will have the option to name your new device (lightbulb) and add it to a room.
Remember: If you connect your lightbulbs to either Google Home or Alexa, you will be able to control them using the names you give them at this stage.
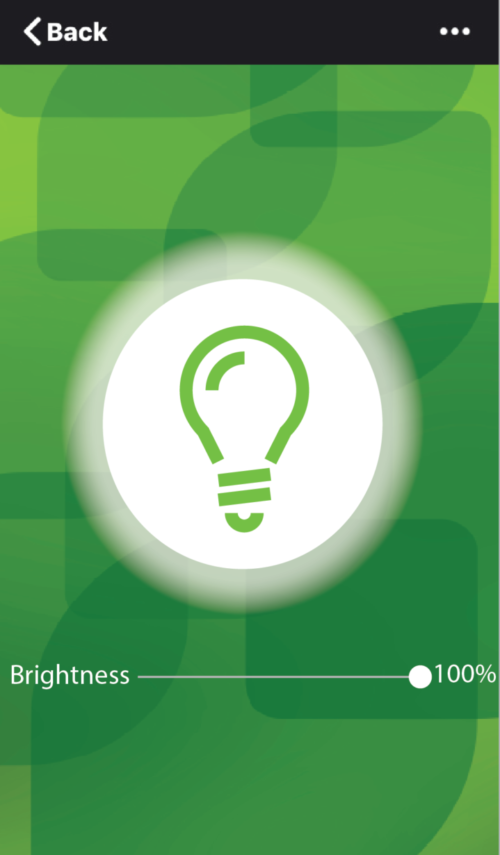
Now that your lightbulb is connected to Wi-Fi, you can control it from anywhere in the world!
To access your connected devices, simply tap one of the devices listed on your home screen.
Use the on-screen controls to adjust the brightness of your lightbulb and to turn it ON or OFF.